Requirements
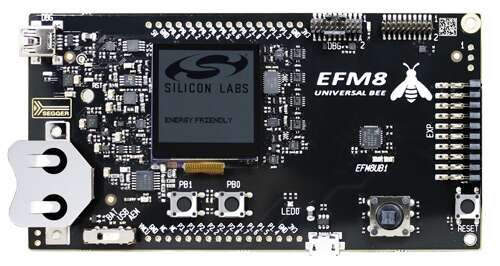
To start developing USB device applications on the EFM8 microcontrollers from SILICON LABS you should get a devkit (like the EFM8 UNIVERSAL BEE PCB5000) and download the latest IDE software from SILICON LABS website. This tutorial is written for the above setup. I assume that you installed all necessary packages.
This guide was written using the following toolchain versions:
- Simplicity Studio Version: SV5.3.0.0
- Universal Configurator Version: 5.0.10
- 8051 SDK Version: 4.2.3
- Keil 8051 Toolchain Version: 9.60.0
- Ubuntu: 20.04
Creating an example project
Connect your devkit to your computer via the debugger port.
Open Simplicity Studio and click Launcher tab in the right top corner.
You should see your board in the Connect Devices list.
Click on Start and from EXAMPLE PROJECTS & DEMOS choose Si8051 Configurator Project.
After you create your project in your desired location double click on the hardware configuration file on bottom of the project file list.
The configuration file ends with .hwconf.
Go to the DefaultMode Peripherals tab in the Configurator view.
- In
ClockingenableClock Control- Change
Select Clock SourcetoInternal High Frequency Oscillator 1 - Change
Clock Source DividertoSYSCLK/1
- Change
- In
CommunicationsenableUSB library- Enable
Clock Recovery - Enable all callbacks in the
Callback Functions - Set your
Vendor IDandProduct IDor leave it as it is for now. Remember to obtain your VID/PID for your product.
- Enable
- In
CoreenableCore- Enable
Enable Prefetchoption - Change
Flash Read TimingtoSYSCLK is below 50 MHz
- Enable
- In
CoreenableInterrupts- Enable
Enable All Interrupts
- Enable
- In
TimersdisableWatchdog Timerby enabling it and- Disabling
WDT Enable
- Disabling
Save your configuration file. All other files should generate automatically.
Fixing IDE bugs
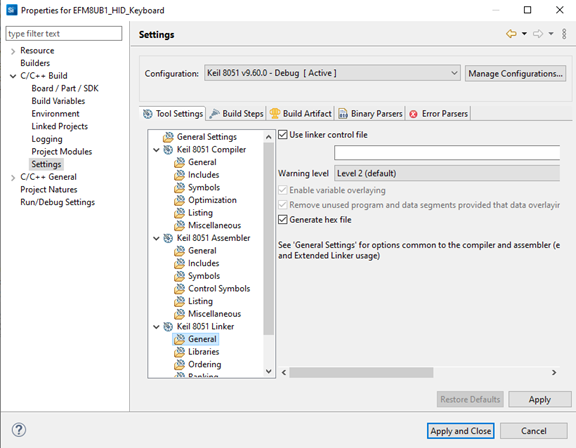
For some reason enabling the USB Library changes the linker settings and prevents us from compiling the code.
When compiling we get the following error:
Errors occurred during the build. Errors running builder ‘CDT Builder’ on project ‘myProject’. Invalid linker control file: Invalid linker control file:
To fix this, right click on your project on the Project Explorer tab and select Properties.
Go to C/C++ Build => Settings => Keil 8051 Linker => General and disable Use linker control file.
You can read more on the SILICON LABS community forum here and here.
When compiling the code for the first time, it is possible to get a “header not hound” error. Simply try to compile the code again.
Connecting to PC
In terminal type:
$ dmesg -w
and connect the devkit to you port with the second USB port. The output should look like this:
[39221.654109] usb 1-4: new full-speed USB device number 53 using xhci_hcd
[39221.981073] usb 1-4: New USB device found, idVendor=04d2, idProduct=ddd5, bcdDevice= 8.59
[39221.981079] usb 1-4: New USB device strings: Mfr=1, Product=2, SerialNumber=3
[39221.981081] usb 1-4: Product: STRING1
[39221.981083] usb 1-4: Manufacturer: STRING2
[39221.981084] usb 1-4: SerialNumber: 0123456789ABCDEF
Example of bulk transfer to PC running a libusb application
Additionally to the steps mentioned above, enable USB Endpoint in the Simplicity Studio Configurator:
- Double click your
.hwconffile and open the Endpoints tab for theUSB library. - Enable
Endpoint 1 INandEndpoint 1 OUT. - Set
Associated Interfaceto0. - Set
Bulk Max Packet Size (bytes)to8. - Set
Transfer typetoBulk. - Set
Polling interval (ms)to1 (0x1).
Now in your main.c in the int main (void){} function add some data and call USBD_Write(EP1IN, <data>, <number of bytes>, true); for example:
int
main (void)
{
  uint8_t test[5] = {1, 2, 3, 4, 5};
  // Call hardware initialization routine
  enter_DefaultMode_from_RESET ();

  while (1)
    {
// $[Generated Run-time code]
      USBD_Write(EP1IN, test, 5, true);
// [Generated Run-time code]$
    }
}
On the PC side we can use libusb to receive the data:
- Instal
libusb-1.0-0-devfrom your packet manager or from libusb website. - Compile the following code with libusb
gcc main.c -I/usr/include/libusb-1.0 -lusb-1.0:- If you have problems with finding the right path to the libusb library use
findfor example:find /usr -name libusb*.hwill list all the paths to the libusb library header. If the results are empty check if the library development files are installed.
- If you have problems with finding the right path to the libusb library use
#include <stdio.h>
#include "libusb.h"

unsigned char data[10];

int main(void)
{
	libusb_device **devs;
	int r;
	ssize_t cnt;
	libusb_device *found = NULL;

	r = libusb_init(NULL);
	if (r < 0)
		return r;

	cnt = libusb_get_device_list(NULL, &devs);
	if (cnt < 0){
		libusb_exit(NULL);
		return (int) cnt;
	}

	for (ssize_t i = 0; i < cnt; i++) {
		libusb_device *device = devs[i];
		struct libusb_device_descriptor *device_des;

		if (libusb_get_device_descriptor(device, device_des) != 0) {
			perror("CAN'T GET DEVICE DESCRIPTOR");
		}

		if (device_des->idVendor == 1234 && device_des->idProduct == 56789) {
			found = device;
			break;
		}
	}

	if (found) {
		libusb_device_handle *handle;

		r = libusb_open(found, &handle);
		if (r) {
			perror("CAN'T OPEN DEVICE");
			return r;
		}

		printf("%d\n", data[0]);

		while(1){
		r = libusb_bulk_transfer(handle, 0x81, data, 1, NULL, 5000);
		if (r) {
			perror("CAN'T TRANSFER");
			return r;
		}
		printf("%d\n", data[0]);
		}

		libusb_close(handle);
	} else {
		perror("NO DEVICE FOUND");
	}

	libusb_free_device_list(devs, 1);

	libusb_exit(NULL);
	return 0;
}
- Connect the microcontroller to your PC and run the program.
- If you see any problems check your user permissions for accessing your USB device or simply run it with
sudo. - If the programs still prints out
NO DEVICE FOUNDcheck if theVendor IDandDevice descriptorare the same in the PC code and in Simplicity Studio.
- If you see any problems check your user permissions for accessing your USB device or simply run it with
- You should see your data printed on the console window.
Further work
From this point you con start to write your own callbacks and routines for your USB enabled device. More information on endpoints, FIFO sizes and how to access them can be found in the Reference Manual for the EFM8 family and chips. I highly recommend to read Axelson, J: Usb Complete 5th Edn: The Developer’s Guide book on writing USB enabled firmware and how to choose the right API calls and settings for your application.